We will
learn how to restrict access to D365 Business Central Environments for users.
Ex: if we
have a user ‘A’ and we would like to provide access to only Sandbox environments
and not to Production environment.
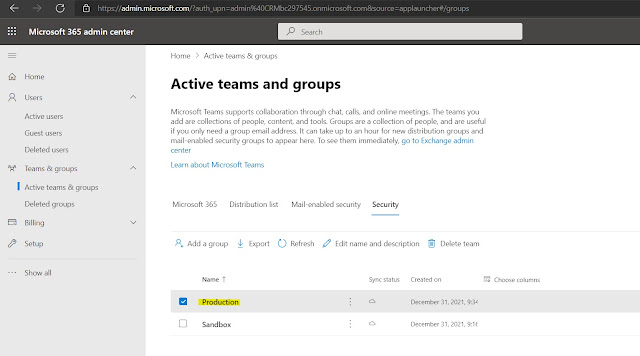
First, go to
Office 365 admin center

Go to “Active
teams & groups” under “Teams & groups”

Click on “Add
a group”

Select Security

Click Next
Provide a
Name and Description

Click Next
Review the
group details

Click on
Create group
New group is
created

Click Close
Go to Security
tab and select the newly created Security group.

Click on Add
group owner
Click on Add
Owner again in next screen

Select user
and click Add

Select Members
tab and click on View all and manage members

Click Add
members
Select user
and click Add

Follow same
steps and create new security group with name “Production” but do not add any
members or do not add member whom we added in ‘Sandbox” security group.
Go to
Dynamics 365 Business Central admin center
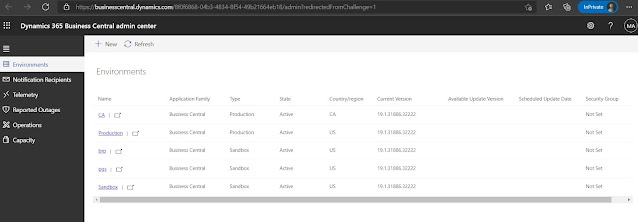
Select the
environment to which you want to assign the newly created group.

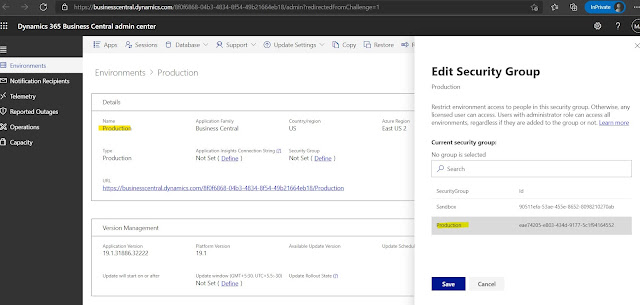
Go to
Security Group and click on Define
Select the
newly created Security Group

Click Save
Click Yes on
confirmation message

Go to Production
environment and setup “Production” Security group.
Now login to
Production environment and notice below error


