Creating
Shopify development stores – Part 3
When
an order is imported from Shopify, the information about the customer is
essential for further processing the document in Business Central. There are
two main options and their combinations:
·
Use a special customer
for all orders.
·
Import the actual
customer information from Shopify.
How the connector chooses which customer to use?
The Import
order from the Shopify function tries to select the customer in the
following order:
1. If the Default Customer No. field
is defined in the Shopify Customer Template for the
corresponding country, then the Default Customer No. is used,
regardless of the settings in the Customer Import From Shopify and Customer
Mapping Type fields.
2. If the Customer Import From Shopify is
set to None and the Default Customer No. is
defined in the Shopify Shop Card, then the Default Customer
No. is used.
The
next steps depend on the Customer Mapping Type.
·
Always
take the default customer,
then the connector uses the customer defined in the Default Customer
No. field in the Shopify Shop Card page.
·
By
EMail/Phone, the connector tries
to find the existing customer by ID first, then by email, and then by phone. If
the customer isn't found - the connector creates a new customer.
·
By
Info, the connector tries
to find the existing customer by ID first and then by the address information.
If not found - the connector creates a new customer.
I am going to use the below settings to map customer
by Email/Phone and Auto create customer if not found.
Set the import of orders on the Shopify Shop Card
A
regular Shopify order can have extra amounts on top, such as shipping charges
or, if enabled, tips. These amounts will be posted directly to the G/L
accounts. Choose the G/L account that should be used for specific transactions:
·
Shipping
Cost Account
·
Sold
Gift Card Account
·
Tip
account
Enable Auto
Create Orders to automatically create sales documents in Business
Central once the Shopify order is imported. The sales document in Business
Central contains a link to the Shopify order. If you select Shopify
Order No. on Doc. Line field, then this information will be repeated
in the sales lines of type Comment.
In Shopify
online store, open the product catalog.
Choose
any product that can be sold, for example ANTWERP Conference Table. Notice that the description contains item
attributes.
Choose
the Buy it now button and proceed to checkout.
1. In the Email or mobile phone number field,
enter admin@CRMbc534738.onmicrosoft.com (or email where you want to receive order and shipping
confirmations).
2. Enter the First name and Last
name
3. Enter the local address.
4. Enable the Save this information for
next time checkbox.
5. Choose the Continue to shipping button.
6. Keep Standard as the shipping method and then choose the Continue
to payment button.
7. In the Credit Card field,
enter 1 if you use (for
testing) Bogus Gateway, if you use Shopify payments in
test mode, enter 5555 5555 5555 4444 in the Credit Card field.
8. Fill in the Name on card field.
9. In the Expiration date field,
enter the current month/year.
10. In the Security code, enter 111.
11. Choose the Pay now button.
12. Email confirmation received
13. Shopify Order created
In
Business Central, do the next steps:
1. Go to the search icon, enter Shopify
Orders, and then choose the related link.
2. Choose the Sync Orders From Shopify action.
3. Select the Shopify Code.
4. Click OK.
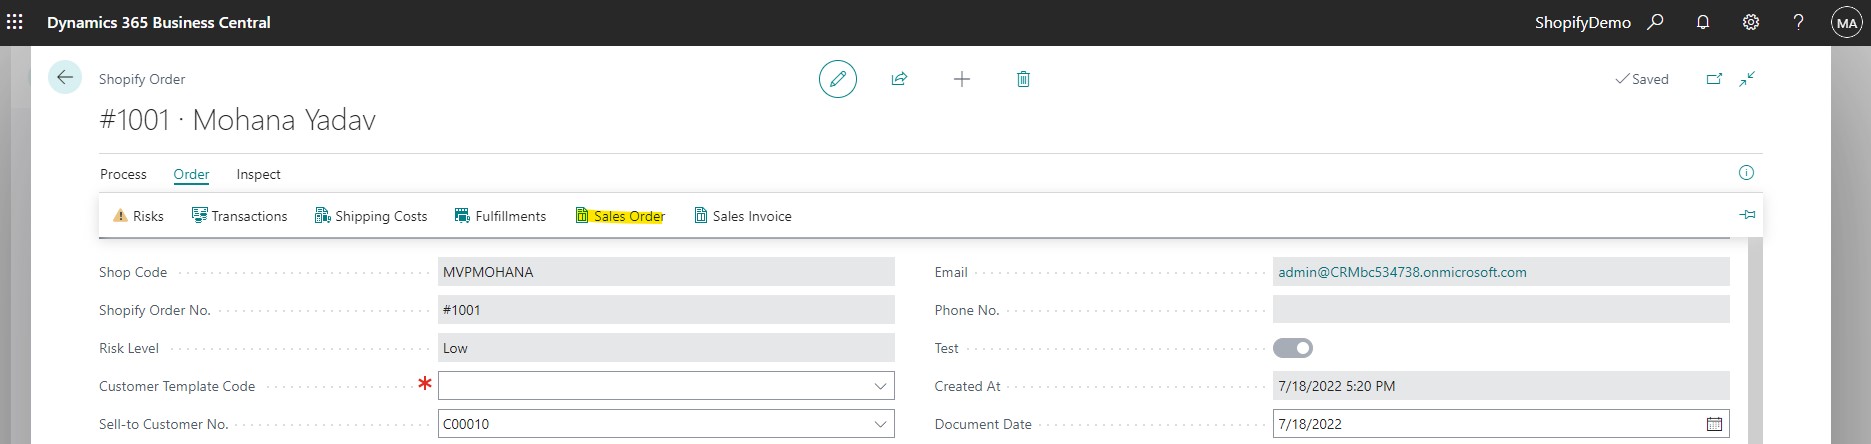
The
imported order is ready for processing.
1. Select the imported order to open the Shopify
Order window.
2. Notice that the new customer and sales order is
created.
3. Choose the Sales Order action
to open the Sales Order window.
4. Choose the Reopen action.
5. In the Agent field,
enter DHL.
6. In Package Tracking No.,
enter 123456789.
7. Choose the Post action,
keep Ship and Invoice option, and then choose the OK button.
Now
physical and financial data is registered in Business Central. It’s time to
notify Shopify about the changes.
1. Go to the search icon, enter Sync
Shipments to Shopify, and choose the related link.
2. Choose OK.
In Shopify
Admin notice that the order is now marked as Fulfilled.
You can also review Shipment details and see the Tracking URL there. If you
run Sync Orders From Shopify again, the order will be archived
in both systems.
Transactions
The payment transactions that took place at Shopify are
synchronized together with the orders and can be viewed from the Shopify Orders page.